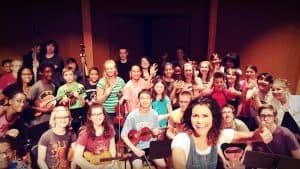
Adapted from a presentation by Christian Howes (founder of Creative Strings) at the 2021 American String Teachers Association National Conference. You can view the original presentation, which includes Parts 1, 2 and 3, of this series on Teaching Improvisation and Harmony- plus interactive play-along sections, below.
The Importance of Suspending Judgement When Teaching Creativity
In the first part of this series, I talked about the importance of separating practicing creative improvisation from applied harmony. Then I walked you through my icebreaker exercise, which I’ve used in string classrooms with students of all ages and ability levels.
Today, I’m going to walk you through another free improvisation exercise that helps students bypass one of the biggest barriers to creative improvisation: self- judgement.
We’re not born with self-judgement- but very quickly, we learn it from our environment. And in music, that means that we become reluctant to express our natural creativity because of the conditioning and socialization that we’ve undergone, particularly if we have a background in classical music.
You see, consciously or not, most of us play music to please others. As students, we often play to please our teachers or parents. Even as adults, we may continue to play to please our internalized teachers or parents, as well as our audiences. And as long as we are operating from this motivation, and we have a classical foundation, we will feel resistant to improvise on the violin, viola, cello, or bass.
But there’s many other reasons that you, or the string students that you teach, might want to play music. Maybe it’s:
- to be popular
- to get a college scholarship
- to make money
- To feel peaceful, like a meditation
- to connect with other musicians (or other people in general)
- to express emotions
Suspending self-judgement is also important in allowing our students to grow as string players and musicians.
I once heard someone say: “compose a hundred pieces and throw them all away and then you’ll be a composer”
What I think he meant by this is that we just need to engage in the process for the sake of it for a while. Later, we can bring this more critical evaluating faculty to it. In fact, I teach all of this in my teacher training courses as well.
So today I’m going to tell you about another exercise that I often do right after the icebreaker. (If you want to watch me perform and explain it live, see the video above at around 10:30)
It’s a simple two-part exercise that can be done in any string classroom or studio where you teach with any level of students on violin, viola, cello, or bass. Or you can do it on your own at home.
In this exercise, we’ll suspend our judgment about what is “good” music for the sake of developing a healthy foundation in our creative improvised practice and remind ourselves and our students that there are many reasons to play music there are many reasons to improvise and be creative and not just for the sake of making “great music that everyone approves of”.
Like the icebreaker, it works because students don’t need to learn anything new to participate. This allows them to use fast, intuitive thinking rather than slow, analytical thinking- which would leave time for judgement. It’s a great way to get students engaged and in a positive mind-space. When I do this live during school visits, the kids do it all together and it’s really fun.
This exercise and the creative improvisation icebreak in part 1 are basically a primer to how I teach creative improvisation. By taking the need for specialized knowledge (like chord progressions, or scales and rhythms specific to a certain song or style), these exercises allow your students to practice pure creativity in a comfortable setting, allowing you and your students to develop more confidence and freedom of expression on your violin, viola, cello, or bass.
It’s what makes my curriculum different from many improvisation-based curriculums, particularly those in jazz studies. Of course, I’m a jazz violinist myself, but jazz curricula are often built around the assumption that students want to learn specific language such as swing rhythms, 2-5-1 chord progressions, blues forms, bebop licks, etc. And not all classical musicians are interested in these things at first. So I’m separating the skills and processes of harmony and improvisation from the Jazz-specific stylistic language and conventions.
Directions for My Creative Improvisation Free Association Exercise for String Students
Part 1: Free Association with Words
Sample directions: I’m gonna say a word and then I want you to say the first word that comes to your mind.
Just remember, the first word that comes to your mind is the correct answer.
- Music (pause)
- School (pause)
- Pizza (pause)
- Tennis racket (pause)
- Street corner (pause)
Teacher’s notes:
When doing this with kids, I always make sure to use simple words that I think everyone in the classroom will be familiar with.
The key is to pick words that will have easy, common associations for your students so that they can respond quickly. Give the students enough time to respond, but don’t move too slowly or you’ll give your students time to judge.
Part 2: Free Association with Playing
Now I’m going to say some words and you’re going to play the first thing that comes to your mind on your instrument.
Just remember, just like with the talking- the first thing that comes to your mind is the right thing to play.
- happy (pause)
- sad (pause)
- loud (pause)
- pizzicato (pause)
- long bows, D major (pause)
Teacher’s notes:
For this section I draw from three different “buckets” or areas: emotions, techniques, and musical elements. You can draw from each bucket separately or combine them to give your students more structure as the exercise progresses. I usually start with emotions (bucket A) and progress from there.
I also like to give students a longer time on these than the verbal exercises- maybe up to a minute.
There’s a lot of different ways to do this- so if you want to see me explain it live, be sure to watch the video at the top of this page instead starting at around 11:30.
More notes on the three "buckets" that I use for this exercise:
You can approach the buckets below one at a time to start (I like to do emotions first by themselves) but you can also combine them together to form more specific prompts.
For example: D major, bouncing bows, and sad. Or fast, eighth notes, and slurred bows.
You can also lead your students through multiple prompts- so 20 seconds of one thing, followed by 10 seconds of something else- to create suites.
The key, like all my creative improvisation exercises, is to only choose things that your students already know as parameters. Using F# major and 7th position as parameters isn’t a good idea in most classrooms!
Bucket A: Emotions
Examples:
- sad
- confused
- relaxed
- happy
- tired
- afraid
There are a couple of reasons that I like using emotions as prompts for creative improvisation.
First, I like to use feelings or emotions as prompts for creative improvisation because they’re relatable- both you and your students know what emotions are.
In the first post in this series, I discussed fast versus slow thinking. Since emotions are something that are known intuitively, using them as a prompt should allow you and your students to respond quickly, without too much analysis.
When I ask you to improvise and play the first thing that comes to your mind there’s no barrier there as long as you feel comfortable expressing the first thing that comes to your mind.
It also allows you and your students to focus on the goal of this improvisation exercise, which is to explore and be creative, not to make “good” music.
Like emotions, there is no “invalid” creativity. Your students’ emotions are valid- so are their creative ideas.
Bucket B: Techniques
Examples:
- bouncing bows
- long bows
- string crossings
- pizzicato
- double stops
- shifting
- vibrato
- harmonics
You’ll notice that these prompts relate to right-hand or left-hand techniques that can be applied to any bowed string instrument whether cello, viola, violin, or concert bass. You can of course adjust them to your studio or classroom if needed- but before you do consider:
Every kid knows what a violin is as soon as they see it. It doesn’t mean that they know how everything about it, but they know what it is.
Any violin, viola, cello, or bass student at any level can experience the idea of a bouncing bow, or a long bow, or a pizzicato. They can understand the basic mechanics of shifting. (One of students even recently mentioned that this idea reminded them of Paul Rolland’s approach to string pedagogy!)
These prompts can give students an opportunity to explore things from a place of curiosity rather than judgement. If I’m bouncing the bow for the purpose of understanding the bounce and getting to know the bounce that’s very different than improvising with an intention of trying to make something that is clever or pleasing to an audience.
Bucket C: Musical Elements
Examples:
- D major
- fast
- eighth notes
- long notes
- space
I used some of these earlier in the icebreaker exercise- tempo; rhythm; duration of notes; pitch, or melody; harmony; phrasing.
You can use density, style, groove, any element of music that you want you can bring into bear during the improvisation or composition process with your violin, viola, cello, or bass playing students.